How to make a simple banner.
This is a simple tutorial, my first, on how to make
a banner for your home. You can use whatever supplies you have
that you just can't part with.
Here is what I used:
- Vintage French flash cards
- Old pieces of ribbon and string
- Glitter in pink and silver
- Glue stick
- Tim Holz distresses ink in Tea Dye
- StazOn Timber Brown ink pad
- A needle
Gather your supplies
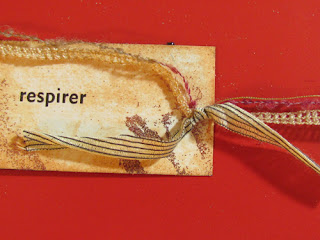
I used vintage flash cards and old ribbon and lace
I used ink for the sides of the flashcards to give them a more vintage look and distress ink on front and backs! Holding your ink pad run along the edges and sides of cards to darken. Let them dry for a couple of minutes.
Take your Distressed ink and rub in a circular motion on fronts and backs of cards. Your flashcards might flip when hanging so make the back pretty also. Mine are two sided. You could also spritz with a dark coffee or tea and then dry with a heat gun if you don't have the ink.
When you are done distressing your flashcards they should look similar to this.
Glitter and glue
Because my cards are French, I have chosen pink and silver glitter to decorate the sides of the cards.
Place both colors on waxed paper. They will mix as you dab the sides of the cards into the mixture.
Take your glue stick and run along sides (edges) of your cards and anywhere you would glitter to stick. Now the fun part dip in glitter and set aside. While they set up get about 6' of ribbon lengths cut. I used two different ribbons and gold thread to attach the flashcards for the banner.
Get a needle and load with your main banner thread. I sew mine in the middle but only because I wanted them to flip. You can sew yours at the top of your flashcards.
We are almost finished! Now choose two more ribbons or lace about the length of your flashcard banner and hold them together at one end and tie all three in a knot, repeat at the other end. I also took a third piece of ribbon about 3" long and tied all ribbons together on every second card.
Thank you for trying my simple little flashcard banner. Please take a look at it in my Etsy shop, OnceTattered


